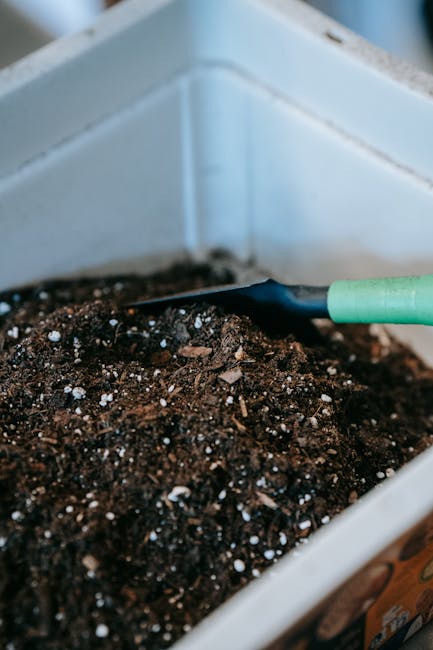
Essential steps for preparing garden soil before planting
Good planting starts long before the first seed or shrub goes into the ground. If the soil is tired, compacted, too wet, too sandy, or simply not suited to what you want to grow, even healthy plants can struggle. That is why the essential steps for preparing garden soil before planting matter so much. Get the soil right first, and everything else becomes easier: watering, root growth, nutrient uptake, and long-term plant health.
In practice, soil preparation is not a glamorous job. It can be muddy, a bit repetitive, and occasionally full of surprises. You might uncover builders' rubble, a patch of stubborn clay, or soil that smells sour after weeks of rain. But this is where a garden really begins. Whether you are getting ready for vegetables, herb beds, borders, or a new lawn edge, a careful approach saves time, money, and frustration later on.
This guide walks through the process in plain English, with practical steps, common mistakes, and a few useful decision points along the way. If you are also planning wider garden work, you may find it helpful to look at the team's garden services overview, or read more about the people behind the work on the about us page.
Table of Contents
- Why essential soil preparation matters
- How soil preparation works
- Key benefits and practical advantages
- Who this is for and when it makes sense
- Step-by-step guidance
- Expert tips for better results
- Common mistakes to avoid
- Tools, resources and recommendations
- Law, compliance, standards, or best practice
- Options, methods, or comparison table
- Case study or real-world example
- Practical checklist
- Conclusion
- Frequently asked questions
Why essential soil preparation matters
Soil is not just dirt. It is a living growing medium that holds water, air, minerals, microbes, and structure. When it is prepared well, roots can move through it easily, seedlings establish faster, and mature plants are less likely to wilt at the first sign of dry weather. When it is neglected, the opposite happens. Water runs off, roots struggle, and fertiliser tends to sit on top instead of doing much good.
Many garden problems that look like "bad plant choice" are actually soil problems in disguise. A rose that keeps sulking, a vegetable bed that never seems to take off, or a border that dries out too quickly can all trace back to poor preparation. Truth be told, the ground beneath your feet does more work than most people realise.
For domestic gardens, this matters even more because conditions are often mixed. One corner might be compacted by foot traffic, another rich from old compost heaps, and a third full of rubble from previous building work. Preparing each area properly gives you a more even start and makes your planting decisions more reliable.
Expert summary: If you want stronger roots, better moisture control, and fewer early plant losses, focus on soil structure first, nutrients second, and planting depth third. That order saves a lot of trouble.
For readers who value practical, responsible work, it is also worth reviewing a company's approach to safety and sustainability. Pages such as health and safety policy and recycling and sustainability show how careful garden work can be carried out with both people and materials in mind.
How essential soil preparation works
Soil preparation works by improving the three things roots need most: air, water, and access. In the average garden, those needs are often out of balance. Clay soil can hold too much water and become sticky. Sandy soil drains too quickly. Compacted soil can become dense enough to slow root growth almost to a crawl. The preparation process aims to correct those weaknesses without creating a completely artificial growing medium.
There are a few main actions involved:
- Assessing the soil so you know what you are working with.
- Clearing the area of weeds, debris, and hidden obstacles.
- Loosening the structure so roots and water can move through it.
- Adding organic matter to improve moisture retention and soil life.
- Balancing nutrients and pH where necessary for the plants you want to grow.
- Leveling and finishing so planting can happen at the right depth.
This is not about making every patch of ground identical. It is about making the soil fit for purpose. A vegetable patch may need a richer, more friable texture than a drought-tolerant border. A new shrub bed may need deeper loosening than a flower bed full of shallow-rooted annuals. Small differences matter, and you can usually feel them in the soil under your hands. That crumbly, open, springy texture is what you are after.
If you are planning a larger project and need clarity on how work is priced, a useful next step is the pricing and quotes page. It can help you understand the shape of a job before you commit, which is always sensible.
Key benefits and practical advantages
Preparing garden soil properly gives you benefits that are obvious almost immediately and others that show up weeks later. Some are aesthetic, but many are practical. Let's face it, a tidy bed is nice, but healthier plants are nicer.
Better root establishment
Roots spread more easily through loosened, well-structured soil. That means plants anchor faster and start feeding sooner. You will often notice the difference in the first month, especially with young plants and transplants.
Improved water management
Good soil preparation helps water soak in rather than run off. In clay-heavy gardens, it can also reduce waterlogging by opening up the structure. In sandy ground, adding organic matter helps the soil hold water for longer.
More reliable nutrient availability
Plants can only use nutrients properly when the soil supports healthy biology and root function. Compost, well-rotted organic matter, and sensible fertiliser use create a better environment for all that to happen.
Fewer weeds and fewer surprises
Clearing weeds and debris before planting means less competition later. It also helps you spot buried brick, glass, or roots that could interfere with planting depth. Not very romantic, but very useful.
Long-term garden resilience
A well-prepared bed tends to cope better with dry spells, heavy rain, and seasonal change. That matters in UK gardens, where the weather can shift from one extreme to another with almost comic timing.
| Soil issue | What it looks like | What preparation helps with |
|---|---|---|
| Compacted soil | Hard surface, poor drainage, weak root growth | Loosening, aeration, organic matter |
| Clay soil | Sticky when wet, cracked when dry | Improved structure, drainage, compost |
| Sandy soil | Dries fast, low nutrient retention | Water-holding capacity, organic matter |
| Weedy soil | Constant regrowth, competition for space | Clearance, mulching, careful cultivation |
| Stony or rubble-filled soil | Difficult digging, uneven planting depth | Sifting, clearance, levelling |
Who this is for and when it makes sense
Soil preparation matters for almost everyone, but the approach depends on what you are planting and what state the garden is in. If you are sowing seeds, raising vegetables, planting hedges, or replacing tired border plants, the groundwork is worth doing properly. Even if you only have a small courtyard or a narrow front garden, the same principle holds.
This is especially relevant if:
- the garden has been neglected for a while
- the soil has been walked on a lot or compacted by stored materials
- you are converting lawn, overgrown beds, or a bare patch into a planting area
- you have heavy clay, light sandy soil, or patchy topsoil
- you want better results from vegetables, herbs, perennials, or shrubs
- you are planning work after building work or landscaping
There is also a seasonal angle. Many gardeners do their main preparation in late winter or early spring, but autumn soil improvement can be equally valuable. To be fair, the best time is often simply when the ground is workable and not waterlogged. If it sticks to your boots in lumps, pause. Pushing on can damage structure more than help it.
If you are unsure whether your project needs light prep or a full reset, a conversation with a local garden team can help. You can use the contact us page to ask about your specific site conditions and next steps.
Step-by-step guidance
The most effective preparation follows a simple order. Skip steps and you often end up fixing the same problem twice. Nobody wants that.
1. Start with a proper assessment
Look at the colour, texture, smell, and drainage of the soil. Does it crumble, or does it clump tightly? Is it full of stones, roots, or rubble? Does water sit on the surface after rain? These clues tell you a lot. You do not need laboratory equipment to spot obvious issues.
2. Clear the area thoroughly
Remove weeds, old roots, stones, broken pots, plastic, and any other debris. For persistent perennial weeds, make sure you remove as much root as possible. If you only chop off the top growth, chances are it will return. Rather annoyingly, some weeds are very committed.
3. Check drainage before you dig deeply
Dig a small test hole and fill it with water. If it drains very slowly, you may be dealing with compacted or clay-heavy soil. That does not mean you cannot plant there, but it does mean you should improve structure and consider plants that suit the conditions.
4. Loosen compacted soil
Use a fork or spade to break up the soil without pulverising it. The aim is to open the structure, not turn it into dust. Overworking soil can make it worse, especially if it is wet. A gentle lift-and-turn motion is often enough for beds. For heavily compacted ground, deeper cultivation may be needed.
5. Add organic matter
Well-rotted compost, leaf mould, or other suitable organic matter improves texture, water retention, and soil life. Work it into the top layer of soil, especially in new beds. In many gardens, this is the single most valuable improvement you can make. Simple, but powerful.
6. Adjust nutrients if needed
Different plants have different needs. Leafy vegetables often appreciate richer soil, while Mediterranean herbs may want sharper drainage and less fertility. If you are growing something particular, match the bed to the plant rather than assuming one mix suits all. That little bit of planning saves disappointment later.
7. Level and rake the surface
Once the soil is improved, level the bed so water spreads evenly and planting depth stays consistent. A fine rake finish is useful for seed beds, while more open texture is fine for shrubs and perennials. Do not obsess over perfection. A garden bed does not need to look like a bowling green.
8. Water lightly and let the soil settle
A gentle watering helps the soil settle into place before planting. If you are planting immediately, make sure the bed is moist but not soggy. If possible, give the ground a little time to settle after digging and amendment. Even a short pause can improve planting results.
9. Plant at the right depth
Once the soil is ready, place plants or seeds at the correct depth for the species you are growing. This is one of those moments where careful preparation pays off. A plant put into lovely soil at the wrong depth can still fail. Soil helps, but technique still matters.
Expert tips for better results
There are a few small habits that make a surprisingly big difference. These are the sort of things that experienced gardeners do almost automatically, and newcomers often learn after one or two frustrating seasons.
- Work the soil when it is moist, not wet. Wet soil smears and compacts; dry soil can be hard to break apart cleanly.
- Use organic matter consistently. One good season of composting is helpful. Several seasons are better.
- Keep foot traffic off new beds. A prepared bed can be ruined quickly if it becomes a shortcut path.
- Match plants to the improved soil, not the other way around. Soil preparation should support the planting plan.
- Observe how the bed behaves after rain. A patch that puddles may need more structural work or a different planting approach.
- Mulch after planting. Mulch helps lock in moisture and reduces weed pressure while the bed settles.
One small but important point: do not assume more fertiliser is always better. If the soil is structurally poor, extra feed will not fix the underlying issue. It is a bit like turning up the heating in a house with the windows open. Warm, yes. Efficient, no.
For gardeners who value responsible material handling, it may also be useful to understand how garden waste is managed. The recycling and sustainability page is a sensible place to look if you want a cleaner, more resource-conscious approach to the job.
Common mistakes to avoid
Most soil-preparation mistakes are understandable. People want to get on with planting, especially when the weather is decent and the plants are already sitting there looking at them. But rushing can create problems that last all season.
Preparing soil when it is too wet
This is one of the biggest mistakes. Working wet soil compacts it and smears the structure. If you can squeeze a shiny ribbon of clay from it, wait.
Ignoring weeds below the surface
Surface clearance is not enough for perennial weeds. Their roots can regenerate quickly, and some spread in ways that catch people out. Remove thoroughly or deal with the problem before planting.
Adding the wrong material
Not all "soil improvers" are equal. Fresh manure, uncomposted matter, or unsuitable fill can cause more harm than good. Use materials that are appropriate for planting and fully broken down where needed.
Over-digging or over-working the bed
There is a point where more digging stops helping. Soil structure can be damaged if it is repeatedly turned over, especially in heavy ground. Better to improve it carefully than to keep fussing with it.
Forgetting to test drainage
Planting in a bed that stays wet for too long is asking for root trouble. If water hangs around after rain, drainage needs to be addressed before planting the wrong species there.
Skipping the final surface check
It sounds minor, but stones, sticks, and uneven patches can make seed sowing awkward and transplanting messy. A quick final tidy saves a lot of fiddling later.
Tools, resources and recommendations
You do not need a shed full of specialist kit to prepare soil well. A small, sensible set of tools is usually enough for most garden jobs.
- Spade: for edging, lifting, and turning soil where needed
- Border fork: for loosening compacted ground without excessive disturbance
- Rake: for levelling and removing stones
- Hand trowel: for smaller beds, planting holes, and detail work
- Wheelbarrow or bucket: for moving compost, weeds, and debris
- Gloves and sturdy footwear: because there is always one hidden bit of brick, isn't there?
For larger gardens or more challenging sites, you may also need soil conditioners, extra topsoil, or help with clearance. That is where professional advice can save effort. If you are comparing services, the services overview can help you understand what a full garden preparation project may involve.
It is also worth checking practical details that build trust when hiring any garden team. Pages such as insurance and safety and payment and security are useful if you want reassurance before booking work.
Law, compliance, standards, or best practice
For most domestic gardening, there is no complicated compliance process just for preparing soil. Still, good practice matters. If you are disposing of waste, moving material off-site, or handling potentially contaminated ground, you should use responsible methods and follow any relevant local requirements. In a city garden, that can matter more than people expect, especially where old building materials, buried waste, or shared access is involved.
Best practice usually includes:
- disposing of green waste and rubble responsibly
- avoiding unnecessary disturbance to nearby trees and roots
- working safely with tools and manual lifting
- being careful around buried services, hard surfaces, and hidden hazards
- using suitable materials for edible beds and family gardens
If you are hiring someone to do the work, it is sensible to ask how they handle safety, waste, and site care. A transparent company should be comfortable discussing these things, not awkward about them. You can also review trust pages like the terms and conditions and privacy policy so you know how your information and agreement are handled.
On larger jobs, especially where there may be heavy lifting, machinery, or access limitations, checking health and safety policy information is simply good sense. No drama, just due diligence.
Options, methods, or comparison table
There is more than one way to prepare soil, and the best choice depends on the bed, the plant, and the current condition of the ground. Here is a straightforward comparison.
| Method | Best for | Advantages | Watch out for |
|---|---|---|---|
| Light cultivation and composting | Moderately healthy beds | Quick, practical, improves topsoil efficiently | May not solve deep compaction |
| Deep digging or double digging | Very compacted or newly created beds | Improves depth and structure | Labour-intensive; can disturb soil life if overdone |
| No-dig preparation | Weedy plots, soil-life focused gardens | Less disturbance, often easier to maintain | Needs time and enough organic material |
| Topsoil replacement | Very poor or contaminated ground | Fast reset, consistent planting surface | Can be costly and may not solve drainage below |
| Raised beds | Poor native soil or awkward sites | Control over soil mix and drainage | Requires materials and regular watering |
Choosing the right method is less about fashion and more about the site. In a courtyard, raised beds may be the cleanest answer. In a long rear garden with decent soil, a lighter approach may be enough. The trick is being honest about the starting point.
Case study or real-world example
A typical example: a homeowner wants to plant a mixed border along a fence that has been bare for years. The ground looks okay at first glance, but after a week of rain it becomes sticky and uneven. A quick fork test shows hard layers underneath, and the soil is full of small stones and old roots.
The preparation process begins with clearance, then loosening the top layer without digging too deeply. A generous amount of well-rotted compost is added and mixed in carefully. The surface is then levelled, watered lightly, and left to settle for a short time before planting. Because the bed is now more open and moisture-retentive, the plants establish with less stress and need less emergency watering during the first month.
What changed? Not magic. Just better groundwork. The plants did not suddenly become tougher; the soil became more supportive. That difference is often subtle at first, then very obvious by midsummer when one border is thriving and the other is quietly sulking.
For readers planning wider work rather than one small bed, it can be worth checking the company's broader approach and service details. A good starting point is the main homepage, then the contact us page if you want to discuss the specifics of your plot.
Practical checklist
Use this checklist before planting. It keeps the process simple and helps you avoid rushing the last stage.
- Assess soil texture, moisture, and drainage
- Remove weeds, stones, rubble, and debris
- Check for compaction or hard layers
- Loosen the soil appropriately for the bed type
- Add well-rotted organic matter
- Adjust the soil structure or fertility if needed
- Level and rake the surface
- Water lightly if the soil is dry
- Wait briefly for the bed to settle if time allows
- Plant at the correct depth for the species
- Mulch and monitor the bed after planting
If you have ticked all of those boxes, you are in a strong position. Not perfect perhaps, because gardens rarely are, but properly prepared.
Conclusion
The essential steps for preparing garden soil before planting come down to careful observation, sensible cultivation, and the patient addition of organic matter. When you do those things well, the whole garden tends to respond more positively. Plants root faster, water behaves better, and the bed becomes easier to manage through the season.
There is a lot of satisfaction in getting soil right. You can feel it under the spade, see it in the crumbly structure, and notice it later when plants settle in without fuss. That quiet improvement is what makes the effort worthwhile.
Get a free quote today and see how much you can save.
If you are ready to move from preparation to planting, or you want help with a larger garden project, take the next step and get in touch. A well-prepared bed is a calm beginning, and in gardening, a calm beginning counts for a lot.
Frequently Asked Questions
What is the first thing I should do before planting in garden soil?
Start by assessing the soil. Check its texture, moisture level, drainage, and whether it contains weeds, rubble, or compacted layers. That quick first look tells you what sort of preparation is needed.
Do I need to dig over the whole garden before planting?
Not always. Some beds only need light cultivation and added compost, while compacted or neglected areas may need deeper work. The right level of digging depends on the soil condition and the plants you want to grow.
What is the best thing to add to garden soil before planting?
In many gardens, well-rotted organic matter such as compost is the most useful improvement. It helps soil structure, water retention, and biological activity. The exact choice still depends on the soil type and planting plan.
How do I know if my soil is too wet to work on?
If the soil sticks heavily to your boots, smears when you dig, or squeezes into a shiny ribbon when handled, it is too wet. Working it at that stage can damage structure and make compaction worse.
Can I plant straight into poor soil if I add fertiliser?
You can, but it is often a false economy. Fertiliser helps with nutrients, not structure. If the soil is compacted, waterlogged, or very dry, roots may still struggle even if the plants are fed.
How long should I wait after preparing soil before planting?
Sometimes you can plant immediately, especially after light preparation and watering. In other cases, letting the bed settle for a short time improves results. If the soil has been deeply worked, even a few days can help it stabilise.
Should I remove all weeds before planting?
Yes, as thoroughly as possible, especially perennial weeds with persistent roots. Surface trimming is rarely enough. If weeds are left behind, they compete with new plants for space, water, and nutrients.
What is the difference between compost and topsoil preparation?
Topsoil is the base growing layer, while compost is an organic amendment added to improve that layer. Compost changes structure and fertility; topsoil provides the main root zone. They work together, but they are not the same thing.
Is raised bed soil preparation different from normal beds?
Yes. Raised beds usually rely on a chosen soil mix or improved fill, so drainage and texture are more controllable. You still need to think about compaction, watering, and nutrient balance, but the setup is often more flexible.
How do I prepare clay soil for planting?
Clay soil usually benefits from careful loosening and the addition of organic matter. Avoid working it when very wet, because that makes compaction worse. In some cases, raised beds or improved drainage may also be helpful.
What should I do if my garden soil contains rubble or ????????? debris?
Remove as much of the debris as possible before planting. Small amounts can interfere with root growth and make the bed uneven. If the problem is extensive, you may need deeper clearance or replacement soil.
Can I prepare garden soil in winter?
Sometimes, yes, if the ground is not frozen or waterlogged. Winter can be a good time for planning, clearance, and some soil improvement work, but heavy digging in poor conditions is usually not wise. The ground tells you when it is ready.
Where can I find help if the soil problem is beyond a simple DIY fix?
If the site is badly compacted, full of debris, or you simply want a professional result, it is sensible to ask for advice. You can review the company's services overview and then use contact us to discuss your garden in more detail.